Using ApTiltPicker
Entered On
Type of Procedure
Short Description
ApTiltPicker is part of the Appion pipeline, and is designed for use in picking particle pairs for RCT reconstructions. Source files can be found at http://code.google.com/p/appion/wiki/TiltInstall. Our current installation is version 2.0b13.
Before beginning, it is assumed your data is in the form of individual mrc images and you have already cleaned the data into useful pairs. If you want to use Ed Brignole's scripts with minimum alteration, see Axel's notes on naming conventions. This protocol only covers particle picking with ApTiltPicker; further processing is beyond the scope of this article.
Procedure
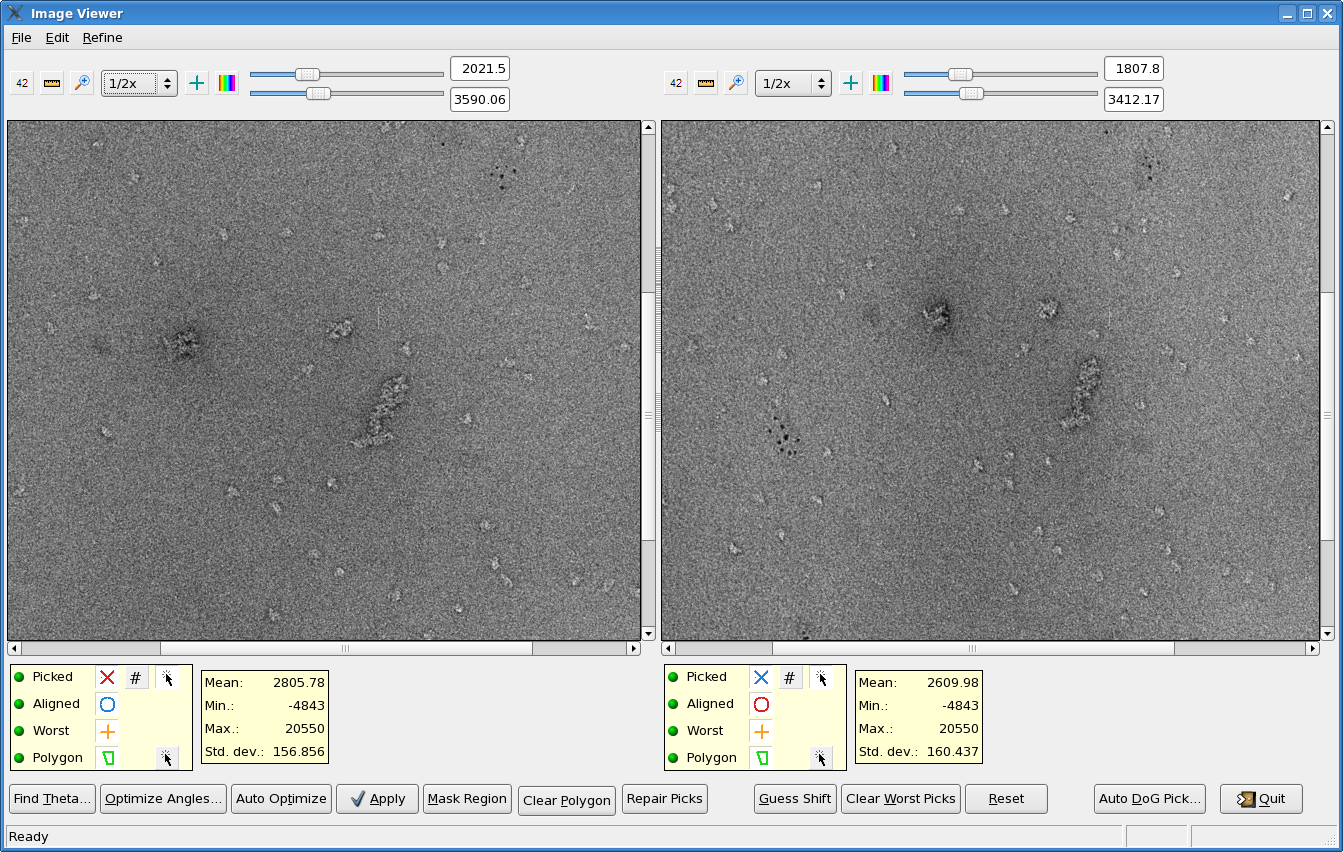
- In your data directory, open ApTiltPicker and load the two images you wish to pick:
> /gware/tiltpicker/ApTiltPicker.py -1 untilted_image_name.mrc -2 tilted_image_name.mrc
You should see the following screen:
- Once you have adjusted the color tables and display magnifications to your preference, you can begin picking particles. Place the cursor over the particle in the left (untilted image) window and click, then repeat in the right window to pick the corresponding particle in the tilted image.
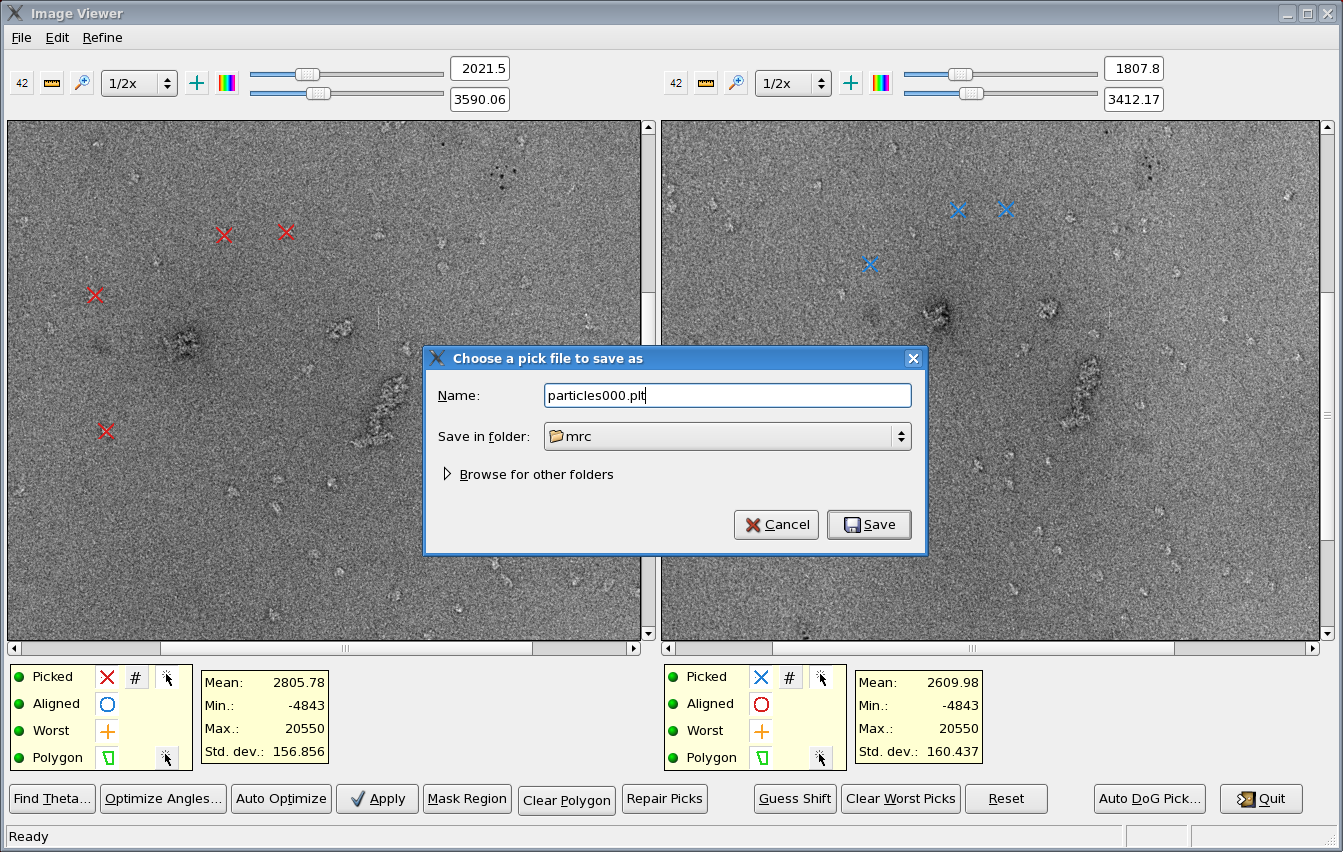
- Once you have picked 4.5 pairs (e.g. after you pick the 5th particle in the lhs window, but before you pick the corresponding rhs particle) a dialogue box will pop up, asking you to name the document file containing the positions of the particles. This document file is written in a spider-like format.
- Upon completing the 5th pair, you can start calculating the angles and rotations that relate the two images to one another. For the initial calculation, click on the "Find Theta" button. A pop up box will show the initial angle calculated between the two images.
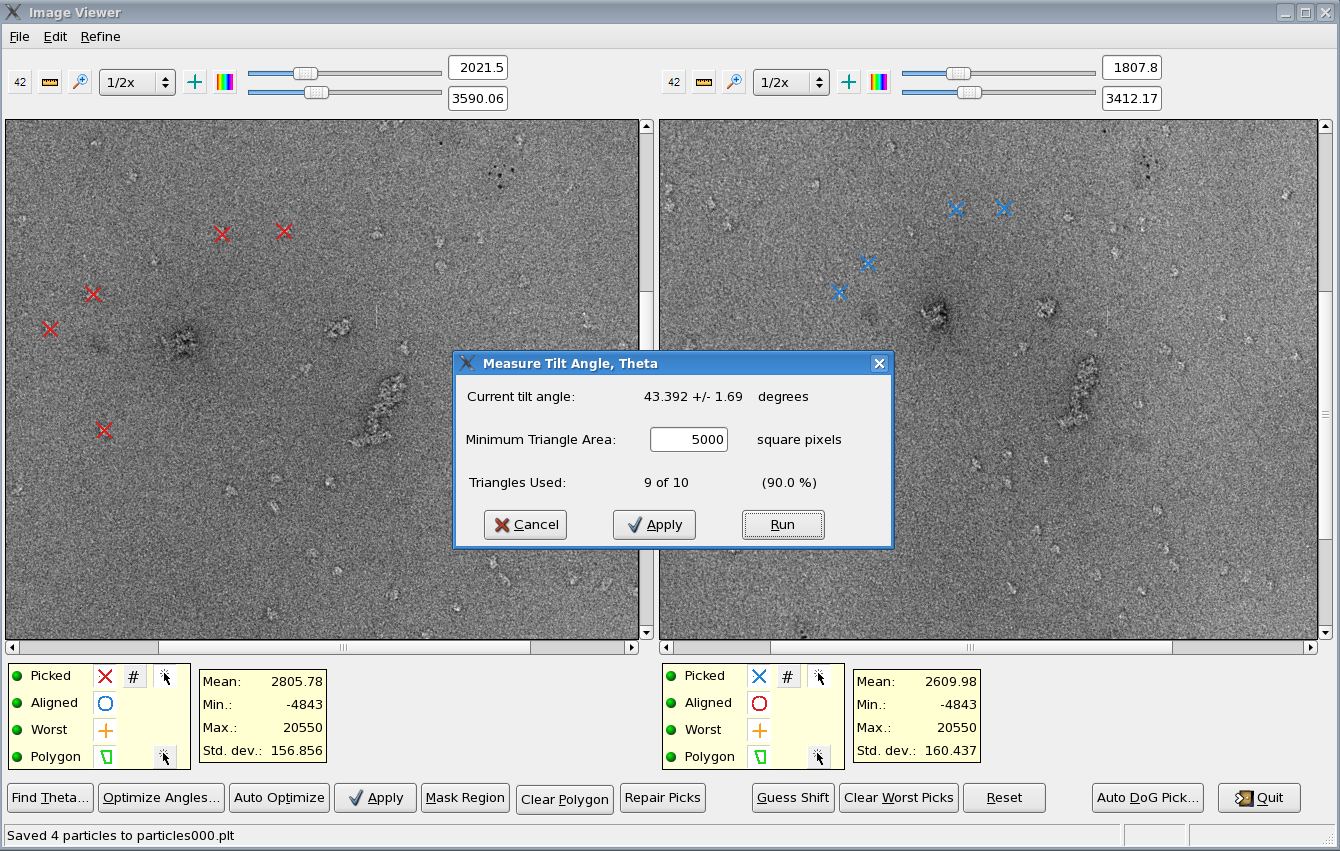
Note that the actual (picked) and calculated positions of the particles are shown on the screen. After the initial calculation, there is often a considerable gap between the picked and calculated positions.
- After the initial angle is calculated, click on the "Optimize Angles" button to calculate additional parameters. If you allow all the values to vary, the calculated positions should then overlap the picked positions very closely.
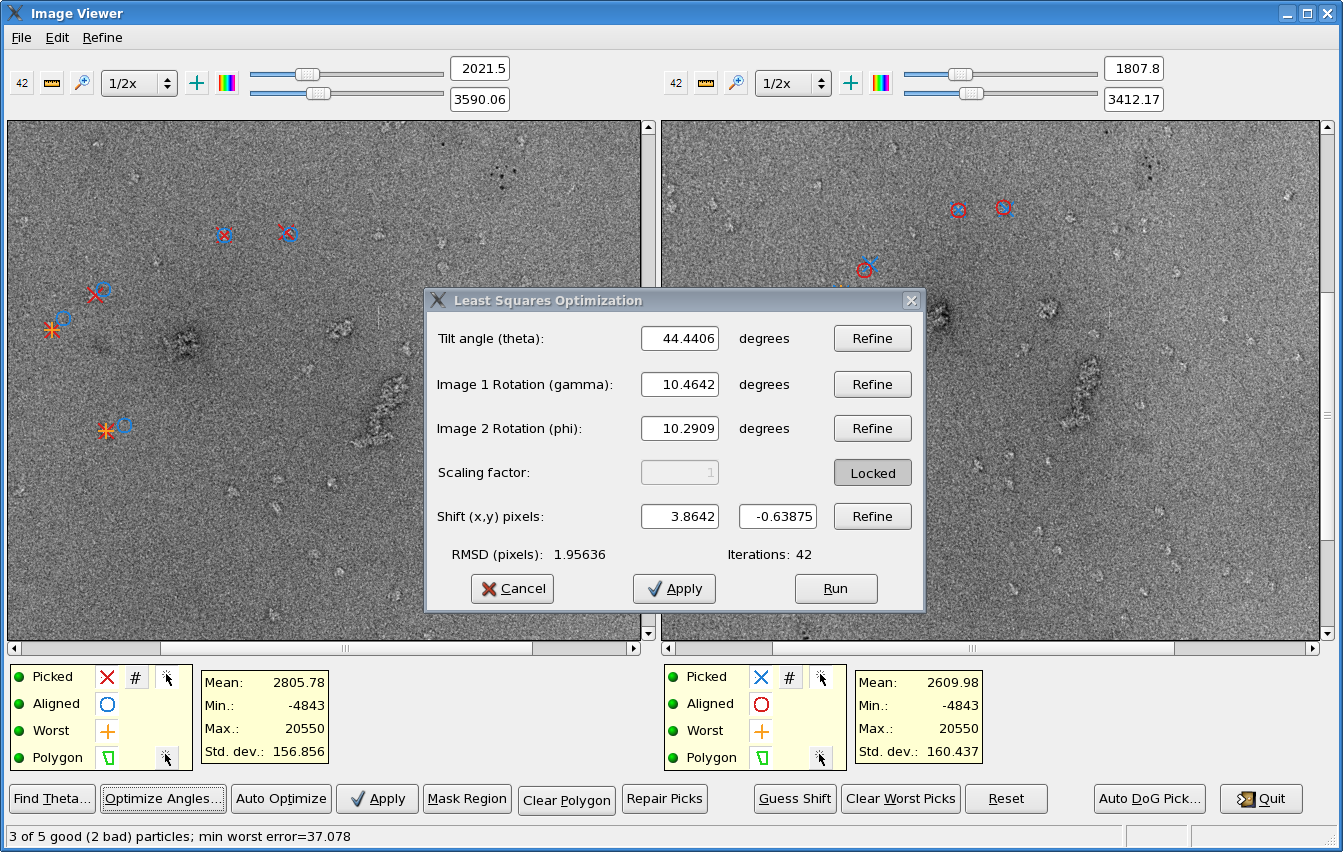
- Continue picking particle pairs. You can update the image parameters at any time and by clicking on any of the parameters, you can either fix them or allow them to float.